The following applies to
Aces High II only.
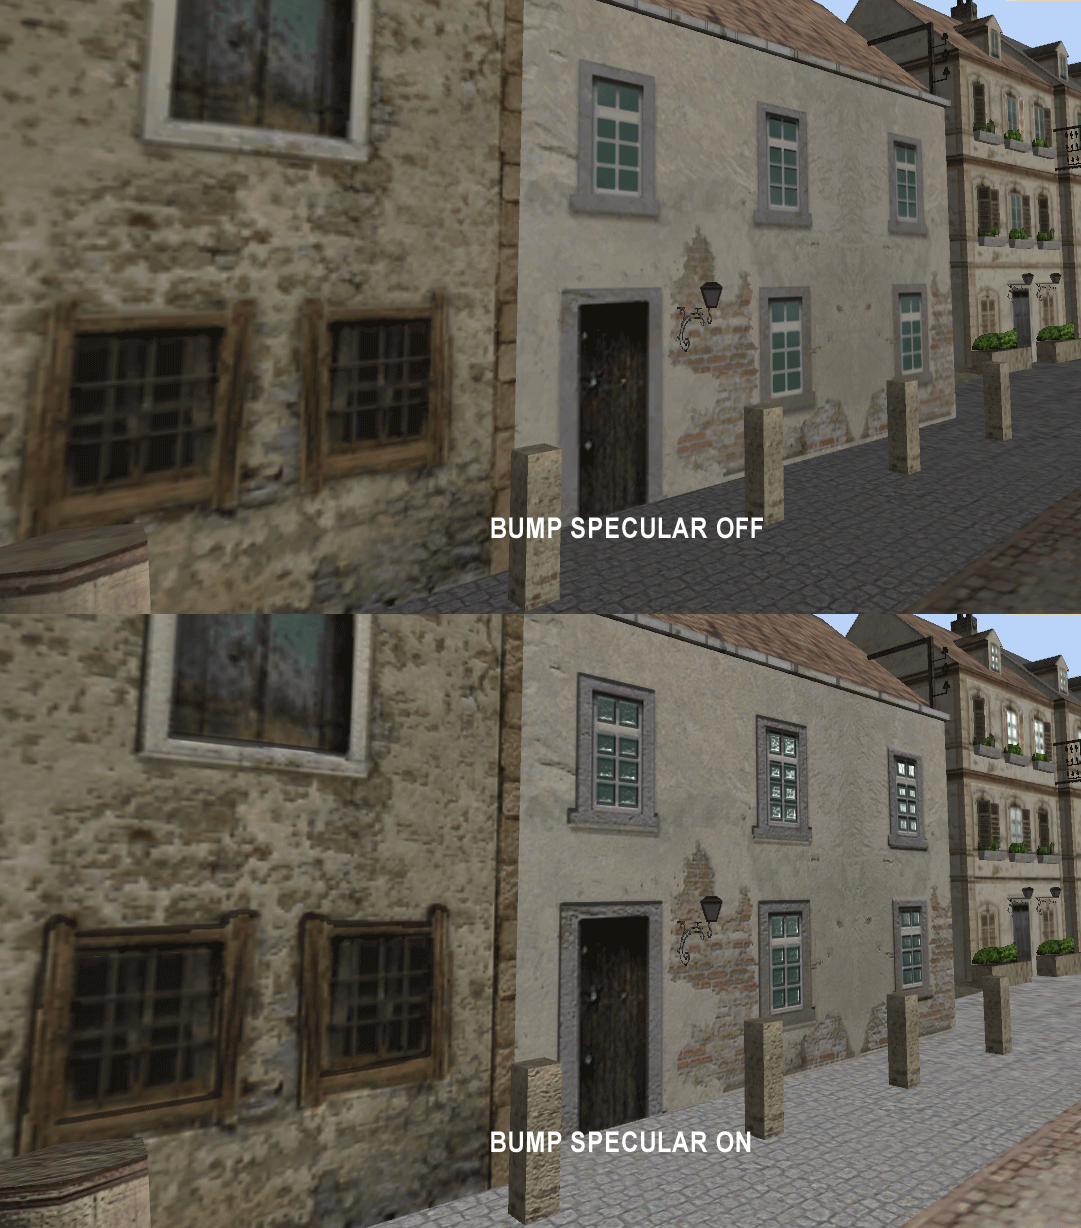
Bump map textures can be useful for adding small details to your skin. Bump maps simulate height and can be used for holes, rivets, raised panels, ect...
Specular maps are used to define how shiny and object is. If part of an object is flat metal, and part of the object is bright shiny metal or glass, we can simulate that on the specular map.

In the picture above, you can see the height change on the building details as well as the specularity of the windows.How to work with Bump Specular maps in Aces High.For this example we will use the p51d. Download the latest "Skin Viewer" from the Hitech Creations website and install into to your Aces High Directory. In the "Skin Viewer" select the P51d and then click on 'Save Textures'. Now navigate to your C:\Hitech Creations\Aces High\skins\p51d folder and look for these files. P51D.bmp
 – This is the base diffuse texture.
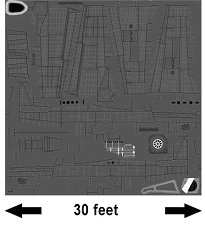
P51D_b.bmp – This is the height data map or bump map.
P51D_b_a.bmp – This is the specular data map.
P51D_b_d.txt – This is the text file that tells how high and wide your bump map should display.
!!For the Bump map and Specular map – we will be working in greyscale. In your graphics program save the file as an 8-bit 256 greyscale bitmap. Do not use exporters like "bright" for these files.!!The Bump Map and Text File.
"texturename_b.bmp"
"texturename_b_d.txt"The basic prinicple behind creating the bump texture is that RGB value 0 (black) is negative, and RGB value 255 (white) is positive. RGB value 128 (grey) is no height change.
The text file "texturename_b_d.txt" allows you to set the width and height of your bumpmap.
Here's the important part – keep this in mind when creating bump maps. In your text file, you want to set the distance that the RGB scale (0-255) covers.
You should see something like this in your text file:
#texture name, Bump width, Bump height, U scale, V scale
# bump width and bump height are optional but must be present
# if U scale and V scale are used. U and V scale are also optional
P51D_B, 0.000000, 0.000000We need to change these values to fit our texture. Using the example of the P51D_B.bmp we need to measure (ballpark estimate is fine) the texture. We're gonna call it a 30 foot width for this example:

Now that we have the width , we need to rough in our height.
For this example I want to say that the height difference from pure white (rgb 255) to pure black (rgb 0)
is 4 inches. So my max height (255) to max depth (0) will be 4 inches.
So 1 foot / 12 inches = .08333 x 4 inches = .333333
Now we put our width and height values in text file and save it.
#texture name, Bump width, Bump height, U scale, V scale
# bump width and bump height are optional but must be present
# if U scale and V scale are used. U and V scale are also optional
P51D_B, 30.000000, 0.333333While you are viewing your bump map, you can increase and decrease the height in the text field to get your desired results.
Best practice is to use the full spectrum (0-255) in the artwork and a low height value in the text file. If your bump map is only using RGB values from 100-160 it wont look as good as using the full spectrum.
For instance, if you just need to add some raised lines on something that that has no negative depressions, you would start your bump map at RGB 0, then draw your raised lines in RGB 255 and then set your height in the text file for how high you want the raised lines to be.
SPECULAR MAPS
"texturename_B_A.bmp"Specular maps are pretty self explanatory.
Black (RGB 0 ) is no specular and White (RGB 255) is the most specular.
To use these, you will have to define a bumped material for the plane you are working on.
In the materials tab of the "
Skin Viewer", you will see an option to adjust the Regular material and the Bump-mapped material.
You will need to increase the specular color to white in the bump mapped material to see any specularity when using a specular map. You will also have to adjust the power to suit your taste.
If you look at the P51D in the "
Skin Viewer", you can see the effects of the specular map by adjust the light direction. You will see that the bare metal parts are shinier than the painted parts of the aircraft.
Lookng at the
p51d_B_A.bmp, you can see that the lighter colored areas are more shiny than the darker areas.
Created May 16, 2012 (Game Version 2.27 Patch 6)