AH 3 Skin Files Format Guide
By Greebo
AH 3 introduced a new file system for player created skins and existing older skins were automatically converted at least partially to this new format. Whereas the old AH 2 skins system used text files to alter some lighting effects globally over the whole skin AH 3 uses image maps to control these effects on a per-pixel basis. This guide is intended to explain the new AH3 format and assumes some knowledge of skinning whether for AH 1 or 2 skins or for some other game. It isn't intended to be a beginner-level how to skin guide.
AH 3 skins consist of one or more sets of five image files in a bmp format. To find out which files can be skinned for a particular ride you should log onto the
AH Skins Management Page. Here the files for each plane and vehicle are listed with their minimum/maximum allowable size, their colour depth format and whether they are either mandatory or optional. Default files can be downloaded from the hangar screen in-game or through the skin viewer which is available from the downloads section of HTC's website.
The file types used in AH 3 are as follows:
The
Diffuse Map (filename.bmp) is the basic skin file that all skins share, it is simply a painting of the skin draped over the 3D shape. The main difference between AH 3 diffuse maps and earlier versions is that this file is now saved as a 32-bit bmp rather than 256 colour bmp. The diffuse map is always mandatory for any skin.
The
Normal Map (filename_N.bmp) gives the illusion of bumps and dips on the surface of the skin by creating the shadows and highlights of these features derived from the current in-game position of the sun. The map stores information about the relative angle and height of each pixel to the surface of the 3D model. It is mandatory for all new skins, is a 32-bit bmp.
A more complete explanation of normal mapping can be found here:-
http://wiki.polycount.com/wiki/Normal_mapCreating a normal map for AH 3 is a two-stage process. First you must create a bump map and then use special software to convert this into a normal map. The initial bump map is pretty much the same as the one used in AH 2 skins where height is defined in shades of grey, with white being maximum height and black minimum. The difference is that in AH 3 the file is saved as a 32-bit colour bmp not as a 256 shade greyscale bmp. So to convert an AH 2 bump map to AH 3 bump map you would just rename it from a _B suffix to a _N suffix and increase the colour depth to 32-bit.
Converting your bump map to a normal map requires a normal map generator. Luckily these are available as free plug-ins for the most popular graphics programs. There are also stand-alone programs but these usually cost money.
Nvidia make a free normal-generating plug-in that works with both Photoshop and Paintshop Pro:-
https://developer.nvidia.com/nvidia-texture-tools-adobe-photoshopThere is also a free normal tool available for Gimp:
http://registry.gimp.org/node/69Your graphics program's help file should tell you exactly how to set up a plug-in if you don't know how. If you use Photoshop CS5 this list of normal mapping tutorials might be of use:-
https://www.youtube.com/results?search_query=CS5+Normal+pluginTo use the normal map generator save your bump map as a 32-bit bmp, load this bmp back into your graphics program and run the normal map plug-in. Once you activate the normal software it will bring up a window giving numerous display options. On the Nvidia plug-in that I use the only settings I have altered from default are "Invert Y" and "Scale". Ticking Invert Y changes the look of the normal file so that it appears light is coming from the top rather than the bottom of the image and this makes the resultant normal image a lot easier to understand. Scale alters the size of the bumps, a bigger number means bigger bumps. I use a scale of 3 for aircraft and 10 for tanks, any other bump editing I do by using more or less extreme shades of grey on the bump map. Click OK and you will now have a violet 3D-style normal map that the game can read.
Note that without the normal map present none of the other lighting effects will work properly, either in the viewer or in the game. So it is best to create this file after the diffuse map but before the specular, power and environmental maps.
The
Specular Map (filename_S.bmp) controls how the surface of the skin reflects the sun's rays. Lighter areas are more reflective and darker less. This file makes a big difference to bare metal skins, the bright reflections on the metal areas and weak ones on the paintwork create a powerful illusion. The file is a 256 shade greyscale bmp. It is essentially the same as the specular map used in AH 2 but in AH 3 the file's suffix has changed from _B_a to a more logical _S. It is mandatory for all new skins.
The
Environment Map (filename_E.bmp) controls how the skin reflects the sky and land around it. It is easily created from a copy of the specular map and often looks quite similar to it. This is because different surfaces tend to reflect both the sun's rays and the environment to a similar degree, i.e shiny metal reflects both types of light better than paint. An area of the environment map that is close to white will give a chrome-like appearance to the skin. While this can look quite pretty my personal view is that this is not very realistic for a WW2 metal finish so I like to dull this effect down. So my environment map shades tend to be a fair bit bit darker than their specular map equivalents. The only areas that are near-white are things like glass navigation lights and highly polished inner gear pistons. The environment map is an optional file and is a 256 shade greyscale bmp.
The
Power Map (filename_P.bmp) controls how sharp the specular reflections are on the skin. Like the environment map this is easily created from a copy of the specular map and also ends up looking similar to it. It looks similar because shiny surfaces like polished metal tend to have sharp highlights and matt surfaces like paint or rubber have vague highlights. My power maps tend to have grey values darker than the specular map but lighter than the environment map. On my power maps the shadow effects I use on the diffuse, specular and environment maps are deleted and white borders are added to the panel lines. The power map is an optional file and is a 256 shade greyscale bmp.
While the Environment and Power maps are optional I would recommend you create them anyway. If you don't the game will substitute the default skin's maps and this will likely spoil the look of your skin. Also it is very easy to do. Just rename two copies of your specular map, maybe make them a bit darker and that's job done.
The
Alpha Map (filename_A.bmp) is used on some AH skins to create transparent holes in the shape. Examples include the holes on the SBD-5 dive flaps, holes in tank tracks and the bullet holes in WW1 aircraft damage files. Where an alpha map is included in the file list for a ride a power map isn't, as the game can only support one or the other file type per set. The alpha map is a 256 shade greyscale where white is visible and black transparent.
You can in theory use an alpha map on any skin to turn parts of it invisible (i.e. instant clip-wing Spitfire) but you will only be able to view the result offline, HTC won't let you submit it like that.
Mapping Example. The composite image below shows the same small sample of the five maps used to make an I-16 skin. Most of the detail on these was created on separate layers for use in the diffuse map and then just reused on the other maps. If this looks a bit daunting bear in mind your maps do not need to be this detailed, just copying across your panel line layer would do for the normal map. Your paint and material finishes and panel line layers would be good enough for the specular, power and environment maps.
The diffuse map shows the worn silver paint used as winter camouflage over the original green with blue below. As well as the basic colours there are shadow and weathering effects like exhaust staining visible.
There are two screenshots of the normal map, one before the normal mapping conversion software is used and one after. On the first map there are black holes for the machine guns, dark panel lines, a rough texture for the exhaust pipe rust and gentle dips where the fabric has sunk between the framework that supports it. Raised details include the fillets between the tail surfaces and fuselage, internal framework and fabric stitching. The after conversion screenshot shows the same details but as the 3D image the game will read.
The specular, environment and power maps are all similar to each other. The shiny silver painted areas are lighter than the other matt colour painted areas so they will reflect more light more sharply from both the environment and the sun. On a natural metal finish aircraft I make this contrast more pronounced as polished aluminium tends to reflect even better than silver paint. Other common features are dark panel lines and a very bright navigation light glass on the rear of the fuselage. The power map is a bit brighter than the environment map but less bright than the specular. The power map also lacks the shadows of the other two and has bright lines either side of the panel lines to represent the sharp edges of the panels. The stitching is also bright so it relects light more sharply.
 Putting it all together.
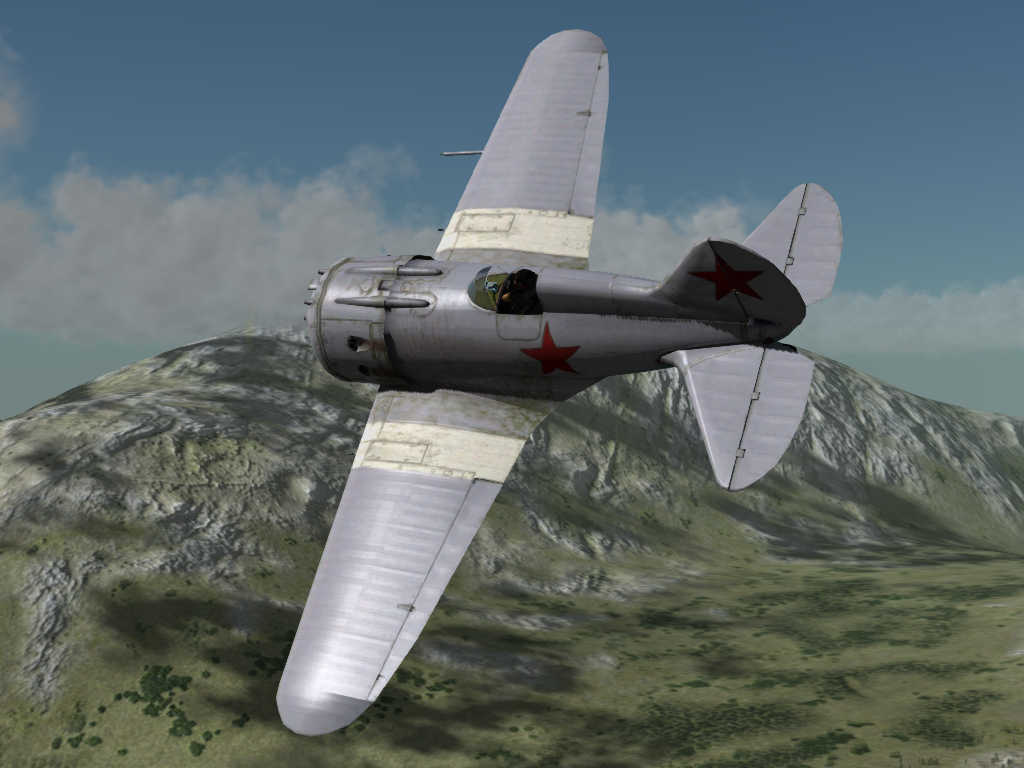
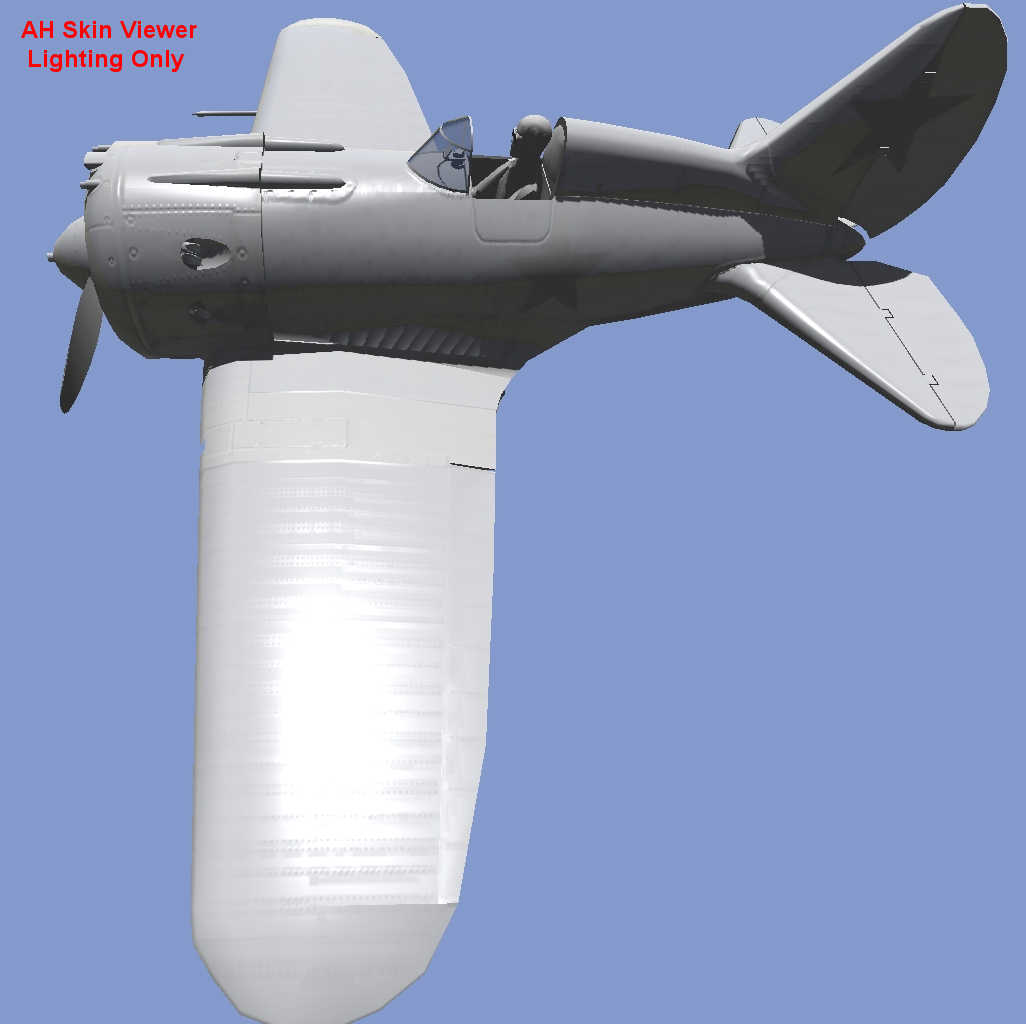
 The AH 3 skin viewer has a number of new buttons to help skinners work with these new files. These allow the effects of each map to be viewed in isolation, or with all the effects shown together or, as in the "Lighting Only" screenshot below, with all the effects except the diffuse map shown. Here you can see the effects of the normal map, the panel lines scribed into the surface and the fabric ripples in the highlights on the wing. Also the specularity, environment and power differences in the reflections between the silver and matt painted areas. The environment effect is not very powerful on this skin but you can see where the white wing stripe is not as blue as the silver painted parts of the wing which are reflecting the sky.
The in-game screenshots shows what it looks like when its all put together with the diffuse map.