88's MOONRISE TUTORIAL
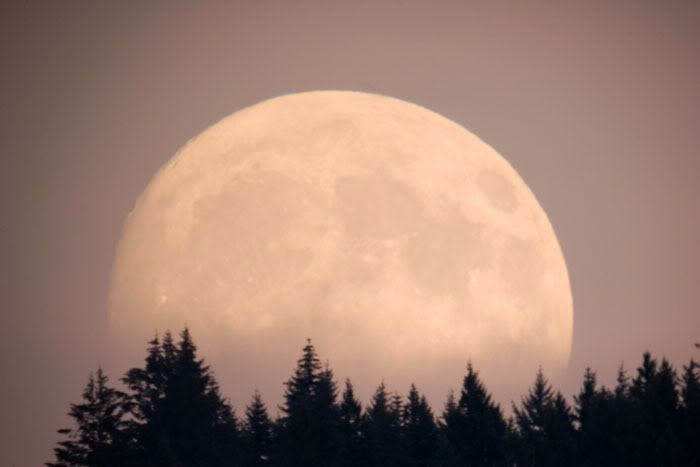
today we will be correcting some basic issues with this awesome image shot by chickenhawk. the issues with the original "or what i still refer to as the "negative" are that it is slightly discolored and it needs to be popped a bit so that it can really shine the way it is supposed to.
give it a try using the original image if you'd like to get a feel for it.
here's the original.
okay, for this one we are using photoshop, but you can just as easilly use the GIMP or any other basic image editing program that has these basic functions.
levels. contrast settings. color settings. sharpen filter. dodge and burn tools.
i begin by going through the following steps:
1. auto levels - image/adjustments/auto levels
2. auto contrast - image/adjustments/auto contrast
3. auto color - image/adjustments/auto color
which leaves me here.

note: these steps worked surprizingly well on this image and i was able to leave it just as it was...often this is not the case and the auto settings will over compensate, so if you find that happening with an image, try adjusting each setting manually to get a better result.
4. curves - image/adjustments/curves
i pull down the curves just a tad and i get a richer image...


5. sharpness - filter/sharpen/sharpen more.
its that atmosphere not the camera that is causing the blur so i sharpen it up with the sharpen more filter. the first time i did it is used the regular sharpen button 3x for the same effect. careful on sharpening...it can make things pixelate real fast.
if you compare this one to the previous one, you will notice the detail that has appeared in the craters on the upper left side of the moon.

6. burn the sky in.
tools - burn tool.
settings: brush 130 pixels (allows me nice coverage without crossing over white of moon) exposure set to 25% - you don't need alot, just enough to begin to see an effect.
after a couple of passes around the moon this is what i get.

7- and finally i add a border which takes me from:
this-
to this-

in seven easy steps.
hope you enjoyed this tutorial. (was my first!

)
p.s. - chickenhawk. thank you for the great image and for visiting my site. a few more of my images can be found
here. it is currently under construction, and will be growing. images may load slower than i would like. hope you will enjoy.
note: all of the images shown on my site were taken with a 128 dollar canon pocket camera.
thanks for letting me use your image. its a really nice shot. perhaps you will make a tutorial for capturing images with a telescope?
88

